
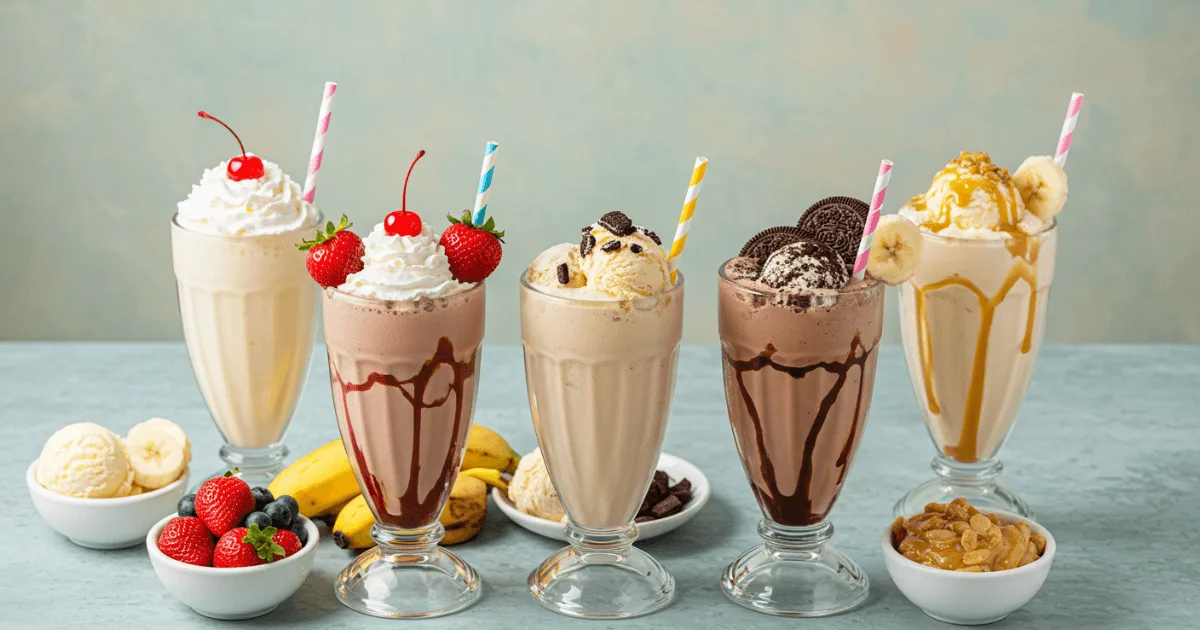
You know that feeling when you take the first sip of an insanely good milkshake? Like, so thick your straw practically stands up in it? All creamy and dreamy, hitting you with a wave of nostalgia—suddenly you’re ten years old again, licking drips off your fingers at some roadside diner. And here’s the kicker: you can make one at home that’s just as epic as the overpriced shakes from Sonic or Chick-fil-A. No fancy gadgets, no weird skills—just you, some ice cream, and maybe poor life choices (worth it).
Whether you’re craving a strawberry milkshake that tastes like fresh-picked berries or a banana shake with peanut butter for that sweet-and-salty kick, this guide has you covered. We’re breaking down 10 foolproof recipes, plus pro tips to avoid common pitfalls (because nobody wants a watery shake).
Ready to blend up some nostalgia? Let’s dive in.
Table of Contents
Why Milkshakes? The Ultimate Comfort Drink
Starting in the 1920s, milkshakes have delighted many, evolving from basic malted drinks to opulent Crazy Mason-style loaded desserts. What makes them so irresistible?
- Nostalgia in a glass – They remind you of ice cream shops, first dates, and summer vacations.
- Endless versatility – Swap ingredients to make them vegan, protein-packed, or extra indulgent.
- Instant crowd-pleaser – Kids, adults, even picky eaters can’t resist a well-made shake.
Fun fact: The global milkshake market is growing by 5.2% yearly—proof that this classic treat isn’t going anywhere.
Milkshake Basics: What You Need to Get Started
Essential Tools
- A good blender – Doesn’t need to be high-end, but should crush ice smoothly.
- Tall glasses & wide straws – Essential for that authentic diner feel.
- Measuring cups – Precision ensures the perfect thickness.
Core Ingredients (And Easy Swaps)
| Ingredient | Why It Matters | Healthy/Vegan Swap |
|---|---|---|
| Ice Cream | Creamy base | Frozen bananas, coconut milk ice cream |
| Milk | Controls thickness | Almond, oat, or soy milk |
| Sweeteners | Enhances flavor | Honey, agave, dates |
Pro Tip: For a thicker shake, freeze your milk into ice cubes before blending.
The 10 Best Milkshake Recipes for Beginners
1. Classic Vanilla Milkshake
The timeless favorite that never disappoints
Ingredients:
| Quantity | Ingredient | Notes |
|---|---|---|
| 2 cups | Vanilla ice cream | High-quality for the best flavor |
| 1 cup | Whole milk | Can substitute oat milk |
| 1 tsp | Vanilla extract | Pure extract preferred |
| Optional | Whipped cream, cherry | For garnish |
Instructions:
- Add ice cream and milk to the blender.
- Blend at a medium setting for half a minute until it becomes smooth.
- Add vanilla extract; pulse 2-3 times to combine.
- Pour into a chilled glass. Top with whipped cream and a cherry.
Insider Advice: For added depth, choose vanilla bean ice cream.
2. Decadent Chocolate Milkshake
For serious chocolate lovers
Ingredients:
| Quantity | Ingredient | Notes |
|---|---|---|
| 2 cups | Chocolate ice cream | |
| ¾ cup | Whole milk | Adjust for thickness |
| 2 Tbsp | Chocolate syrup | Plus extra for drizzle |
| 1 tsp | Instant coffee (optional) | Enhances chocolate flavor |
Instructions:
- Blend ice cream, milk, and syrup for about 45 seconds until the mixture is smooth.
- Add coffee if using; blend 5 more seconds.
- Drizzle chocolate syrup inside the glass before pouring.
3. Fresh Strawberry Milkshake
Bursting with real berry flavor
Ingredients:
| Quantity | Ingredient | Notes |
|---|---|---|
| 1½ cups | Vanilla ice cream | |
| 1 cup | Frozen strawberries | No need for ice |
| ½ cup | Milk | Whole or 2% preferred |
| 1 Tbsp | Sugar (optional) | If berries are tart |
Instructions:
- Blend strawberries and milk first until smooth.
- Add ice cream; blend 30 seconds more.
- Taste and add sugar if needed.
Secret: Add 1 tsp lemon juice to brighten flavors.
4. Cookies & Cream Dream
Oreo magic in every sip
Ingredients:
| Quantity | Ingredient | Notes |
|---|---|---|
| 2 cups | Vanilla ice cream | |
| ¾ cup | Milk | |
| 5 Oreos | Plus 2 crushed for topping | |
| 1 tsp | Vanilla extract |
Instructions:
- Put ice cream, milk, and three Oreos into a blender and blend until the mixture is smooth.
- Add the remaining two Oreos and pulse three times to achieve chunks.
- Top with crushed Oreos.
5. Peanut Butter Banana Shake
Creamy, nutty perfection
Ingredients:
| Quantity | Ingredient | Notes |
|---|---|---|
| 1½ cups | Vanilla ice cream | |
| 1 ripe | Banana | Frozen slices work too |
| ¼ cup | Peanut butter | Creamy or crunchy |
| ½ cup | Milk | |
| 1 Tbsp | Honey | Optional sweetener |
Instructions:
- Blend the banana and peanut butter first.
- Add remaining ingredients; blend until smooth.
- Drizzle with extra PB on top.
6. Coffee Lover’s Shake
Your caffeine fix, creamy and cold
Ingredients:
| Quantity | Ingredient | Notes |
|---|---|---|
| 2 cups | Coffee ice cream | Or vanilla + 1 Tbsp instant espresso |
| ½ cup | Cold brew coffee | Strong preferred |
| ½ cup | Milk | |
| Whipped cream | Optional |
Instructions:
- Blend all ingredients until frothy.
- Top with whipped cream and cocoa powder.
7. Mint Chocolate Chip
Refreshing and indulgent
Ingredients:
| Quantity | Ingredient | Notes |
|---|---|---|
| 2 cups | Mint chip ice cream | |
| ¾ cup | Milk | |
| ¼ tsp | Peppermint extract | For an extra minty kick |
| Chocolate shavings | Garnish |
Instructions:
- Blend ice cream and milk until smooth.
- Add extract; pulse to combine.
- Top with chocolate shavings.
8. Copycat Chick-fil-A Banana Pudding Milkshake
The famous flavor at home
Ingredients:
| Quantity | Ingredient | Notes |
|---|---|---|
| 1½ cups | Vanilla ice cream | |
| 1 ripe | Banana | |
| ½ cup | Milk | |
| 3 | Vanilla wafers | Plus 2 crushed |
| 1 Tbsp | Instant vanilla pudding mix | Secret ingredient! |
Instructions:
- Blend banana, ice cream, milk, and 1 wafer.
- Add pudding mix; blend 10 more seconds.
- Top with crushed wafers.
9. Sonic-Style Oreo Blast
Just like the drive-in favorite
Ingredients:
| Quantity | Ingredient | Notes |
|---|---|---|
| 2 cups | Vanilla ice cream | |
| ½ cup | Milk | |
| 6 Oreos | Divided | |
| 2 Tbsp | Chocolate syrup |
Instructions:
- Blend ice cream, milk, and 4 Oreos.
- Swirl in syrup; top with 2 crushed Oreos.
10. Seasonal Pumpkin Spice Shake
Fall into a glass
Ingredients:
| Quantity | Ingredient | Notes |
|---|---|---|
| 1½ cups | Vanilla ice cream | |
| ½ cup | Milk | |
| ¼ cup | Pumpkin puree | Not pie filling |
| 1 tsp | Pumpkin pie spice | |
| Whipped cream | Garnish |
Instructions:
- Blend all ingredients until smooth.
- Add a layer of whipped cream and a hint of spice on top.
Pro Tips for the Perfect Milkshake
- Texture Tricks:
- Use frozen fruit instead of ice to avoid dilution.
- Blend in the ice cream last to prevent over-mixing.
- Flavor Boosters:
- A pinch of salt makes sweet flavors pop.
- Espresso powder deepens chocolate shakes.
Common Milkshake Mistakes (And How to Fix Them)
Problem: Too thin?
Fix: Add more ice cream or a frozen banana.
Problem: Too thick?
Fix: Splash in milk until it pours smoothly.
Problem: Bland taste?
Fix: A dash of vanilla or cinnamon works wonders.
Shake Up Your Life!
You’ve got the recipes – now it’s time to fire up that blender and get creative! Whether you’re chasing that perfect Sonic copycat or inventing your wild combination (peanut butter-bacon-maple shake, anyone?), remember: the only rule is to make it ridiculously tasty.
Your Move: Which flavor’s calling your name? Mix it up, take a photo, and tag us – we can’t wait to see your milkshake creations!
FAQs
How do I make a basic milkshake?
Add ice cream and milk to a blender. Too thick? Add milk. Too thin? More ice cream. Boom – you’re a milkshake pro.
Milkshake vs smoothie – what’s the deal?
Milkshakes = sweet, creamy indulgence (ice cream + milk). Smoothies = the “healthy” option (usually fruit + yogurt/juice).
What crazy stuff can I add?
The world’s your oyster! Smashed cookies, fresh fruits, Nutella, espresso shots, and a touch of bourbon for the adults.
Why’s it called a milkshake?
Previously, people combined milk with flavorings. Thank goodness for blenders, right?
When’s the best time for a milkshake?
Trick question – the answer is always. Breakfast shake? We won’t tell.
What do Americans call milkshakes?
Just “milkshakes,” though if it’s extra thick, some folks say “thickshake.”
Now go forth and blend! And if you invent something amazing (or disastrous), you know where to find us. Happy shaking!