
You know, that magical pastry that broke the internet about a decade ago? I still remember my first one. I took a bite, and my brain short-circuited. It was flaky, buttery, sweet, and creamy all at once. It was essentially a croissant and a doughnut, with a beautiful, deep-fried baby in between.
Table of Contents
The genius behind this is a guy named Dominique Ansel in New York City. People lined up for hours for these things. It was a whole phenomenon.
But let’s be real: making the actual cronut dough from scratch is a three-day project requiring the patience of a saint. Where we can actually win, and have a ton of fun, is with the glaze. That gorgeous, shiny, flavor-packed topcoat is what makes a cronut a cronut. So, let’s nail it.
What Even Is a Cronut, Anyway?
Before we get our hands sticky, let’s get on the same page.
The Cronut De-Mystified: It’s a Croissant-Doughnut Mashup
Imagine all the best parts of a super flaky, buttery croissant. Now, imagine it got a fun makeover and was fried into a ring shape like a doughnut. That’s the cronut. It’s not just a fancy donut; it’s a whole architectural marvel made of dough and dreams.
The Secret to That Mind-Blowing Texture
The magic isn’t just in the frying; it’s in the layers. They make the dough by folding a crazy amount of cold butter into it repeatedly. This is called “lamination.” When it fries, the water in those butter layers steams up and pushes the dough apart, creating countless flaky, airy layers. It’s pure science, and it’s delicious.
Why the Glaze is the Superstar
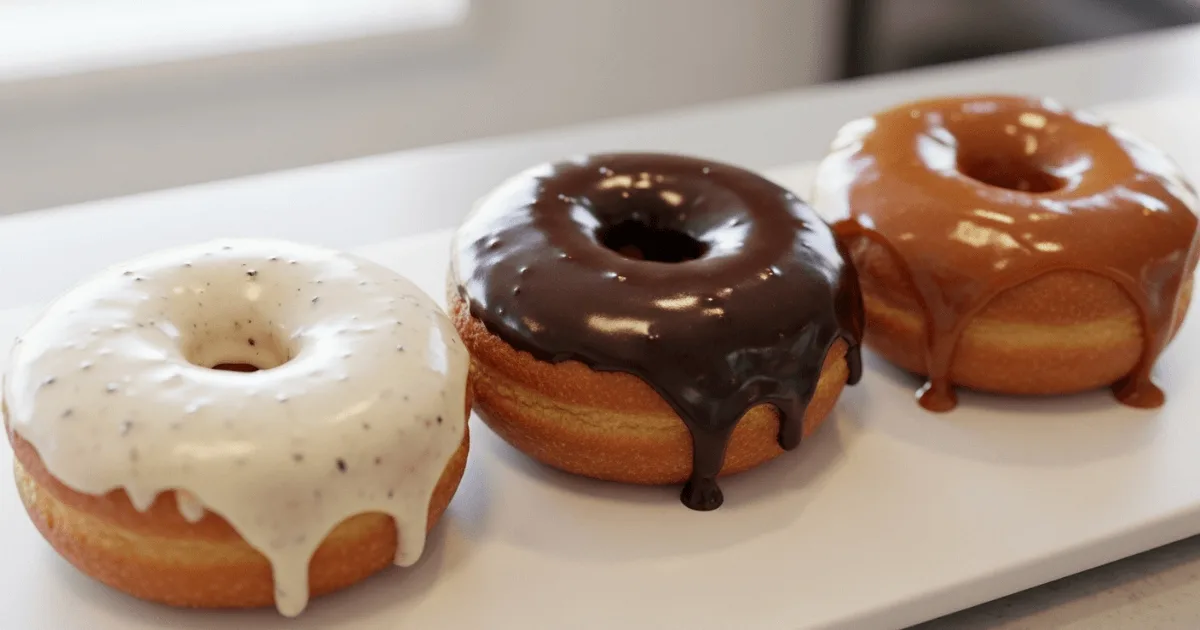
After all that work making and frying the dough, the glaze is your chance to shine. It’s not just a pretty face—it’s the flavor bomb that takes your homemade pastry from “Hey, this is good” to “OH WOW, this is as good as the bakery.” The original cronut flavors included Rose Vanilla and Lemon Maple, and the glaze was a huge part of that identity.

Your New Go-To Glaze Recipes
Alright, enough talk. Let’s make some glazes. These three are classics for a reason—they’re simple, delicious, and will make you look like a pastry pro.
1. The “Can’t-Go-Wrong” Vanilla Bean Glaze
This is your ride-or-die, classic glaze. It’s sweet, simple, and lets the buttery cronut flavor be the star. Using a real vanilla bean pod makes it look and taste fancy, but vanilla extract works great too!

Cronut with Vanilla Bean Glaze
Equipment
- Stand mixer (with dough hook if you’ve got one)
- Rolling Pin
- Dough cutter or round cookie cutter
- Deep-fryer or heavy pot
- Candy thermometer
- Cooling rack
- Mixing bowl & whisk
Ingredients
For the Cronut Dough:
- 2 ½ cups all-purpose flour
- 2 ¼ tsp active dry yeast
- ¼ cup warm milk (110°F / 43°C)
- 3 tbsp sugar
- ½ tsp salt
- 1 egg
- ¾ cup cold unsalted butter (for lamination)
- ⅓ cup water
For the Vanilla Bean Glaze:
- 1 cup powdered sugar
- 2 tbsp whole milk
- 1 vanilla bean (or 1 tsp vanilla bean paste)
- Pinch of salt
Instructions
Cronut
- Mix warm milk, sugar, and yeast in a small bowl and let it hang out for 10 minutes until it gets foamy.
- In a stand mixer, combine flour, egg, salt, and the yeast mix. Knead until smooth, then let it chill for 30 minutes.
- Roll out the dough into a rectangle, plop the cold butter in the middle, and fold it like a letter. Roll, fold, chill — repeat 3 times. (Yep, it’s a workout.)
- Roll to ½-inch thick, cut into rings, and let them puff up for about an hour.
- Heat oil to 350°F (175°C) and fry each side for 2–3 minutes until golden and irresistible.
Glaze
- Mix powdered sugar, milk, and vanilla and whisk until smooth.
- Dunk cooled Cronuts into the glaze, let the excess drip off, and let them dry on a rack.
Notes
Nutrition (per Cronut)
- Calories: ~420 kcal
- Carbs: 45 g
- Fat: 22 g
- Protein: 6 g
- Sugar: 25 g
- Sodium: 90 mg
2. The “Chocolate Lover’s Dream” Glaze
For my fellow chocoholics, this one’s for you. It’s rich, super chocolatey, and has that perfect, glossy finish that looks professional.
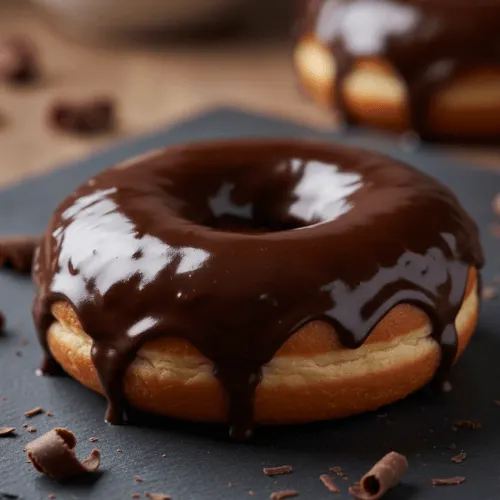
Cronut with Chocolate Glaze
Equipment
- Stand mixer
- Rolling Pin
- Deep-fryer or pot
- Candy thermometer
- Cooling rack
- mixing bowl
- Whisk
Ingredients
For the Cronut Dough:
- 2 ½ cups all-purpose flour
- 2 ¼ tsp active dry yeast
- ¼ cup warm milk (110°F / 43°C)
- 3 tbsp sugar
- ½ tsp salt
- 1 egg
- ¾ cup cold unsalted butter (for lamination)
- ⅓ cup water
For the Vanilla Bean Glaze:
- 1 cup powdered sugar
- 3 tbsp cocoa powder
- 2 tbsp milk
- 1 tbsp butter
- ½ tsp vanilla extract
Instructions
Cronut
- Mix warm milk, sugar, and yeast in a small bowl and let it hang out for 10 minutes until it gets foamy.
- In a stand mixer, combine flour, egg, salt, and the yeast mix. Knead until smooth, then let it chill for 30 minutes.
- Roll out the dough into a rectangle, plop the cold butter in the middle, and fold it like a letter. Roll, fold, chill — repeat 3 times. (Yep, it’s a workout.)
- Roll to ½-inch thick, cut into rings, and let them puff up for about an hour.
- Heat oil to 350°F (175°C) and fry each side for 2–3 minutes until golden and irresistible.
Glaze
- In a small saucepan, melt butter and whisk in cocoa powder.
- Add milk and powdered sugar, stirring until it’s smooth and glossy.
- Take off the heat, stir in vanilla, and you’ve got chocolate perfection.
- Dip cooled Cronuts into the glaze and let them rest on a rack until the glaze firms up.
Notes
Nutrition (per Cronut)
- Calories: ~440 kcal
- Carbs: 46 g
- Fat: 23 g
- Protein: 6 g
- Sugar: 27 g
- Sodium: 95 mg
3. The “Cozy Morning” Maple Glaze
This tastes like a fancy Sunday breakfast. It has a deep, caramel-like maple flavor that’s just chef’s kiss with buttery pastry. Please, for the love of all that is good, use real maple syrup.
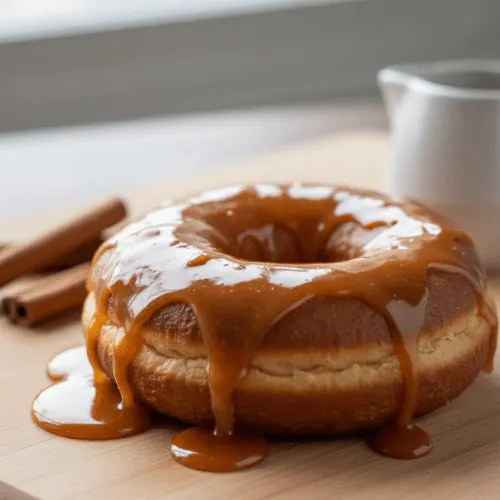
Cronut with Maple Glaze
Equipment
- Stand mixer
- Rolling Pin
- Deep-fryer or pot
- Candy thermometer
- Cooling rack
- saucepan
- Whisk
Ingredients
For the Cronut Dough:
For the Maple Glaze:
- 2 oz unsalted butter
- ⅔ cup powdered sugar
- 2 tbsp pure maple syrup
- 2 tsp vanilla extract
Instructions
Cronut
- Mix warm milk, sugar, and yeast in a small bowl and let it hang out for 10 minutes until it gets foamy.
- In a stand mixer, combine flour, egg, salt, and the yeast mix. Knead until smooth, then let it chill for 30 minutes.
- Roll out the dough into a rectangle, plop the cold butter in the middle, and fold it like a letter. Roll, fold, chill — repeat 3 times. (Yep, it’s a workout.)
- Roll to ½-inch thick, cut into rings, and let them puff up for about an hour.
- Heat oil to 350°F (175°C) and fry each side for 2–3 minutes until golden and irresistible.
Glaze
- Fry up your Cronuts following the same dough method.
- Melt butter over low heat, then stir in maple syrup and vanilla.
- Whisk in powdered sugar until smooth and shiny.
- Dip your cooled Cronuts halfway into the glaze, then set them on a rack to dry.
Notes
Nutrition (per Cronut)
- Calories: ~430 kcal
- Carbs: 47 g
- Fat: 22 g
- Protein: 6 g
- Sugar: 26 g
- Sodium: 85 mg
Pro Tips for Glazing Like a Boss
Here are a few secrets to keep your glaze game strong.
How to Avoid a Soggy Disaster
The number one rule: let your cronuts cool completely! If they’re even a little warm, the glaze will melt and seep into those flaky layers, turning them into a sad, soggy mess. Cool them on a wire rack so air circulates all around. When glazing, do a quick dip—not a long swim.
The Secret to That Bakery-Window Shine
You know that perfect, glossy finish you want to photograph? Make sure the sugar is completely dissolved. Sifting is the first step. For the chocolate glaze, corn syrup adds shine. If adventurous, warm your milk or butter slightly before mixing to dissolve sugar faster.
FAQ
Where did this thing come from?
Dominique Ansel, a brilliant pastry chef, invented it at his New York City bakery in 2013. It caused a sensation.
Is it a croissant or a doughnut?
It’s both! Made with croissant dough (all those layers!) but fried and shaped like a doughnut. It’s a glorious hybrid.
What’s the big difference between a cronut and a normal donut?
The dough! Regular donuts are a cakey, sweet bread. Cronuts are made from laminated dough, creating hundreds of paper-thin, buttery layers. It’s a texture thing.
How do I get those perfect flaky layers at home?
Patience. Keep the dough cold and don’t rush folding and resting. It’s a labor of love.
Help! My glaze made my cronut soggy!
You probably glazed it while it was still warm. Next time, wait until it’s completely cool to the touch. It makes all the difference.
How do I get that super shiny, professional glaze?
Sift your sugar! For maximum shine, add a bit of corn syrup or warm your liquids gently before mixing to get a mirror-like finish.
The Icing on the Cake
The cronut proves that playing with your food is a great idea. While the dough is a project for another day, mastering the glaze is something you can do right now. These three classics—vanilla, chocolate, and maple—are your perfect starting points. They’re easy, delicious, and elevate your homemade treat into something truly special. So go on, get glazing!